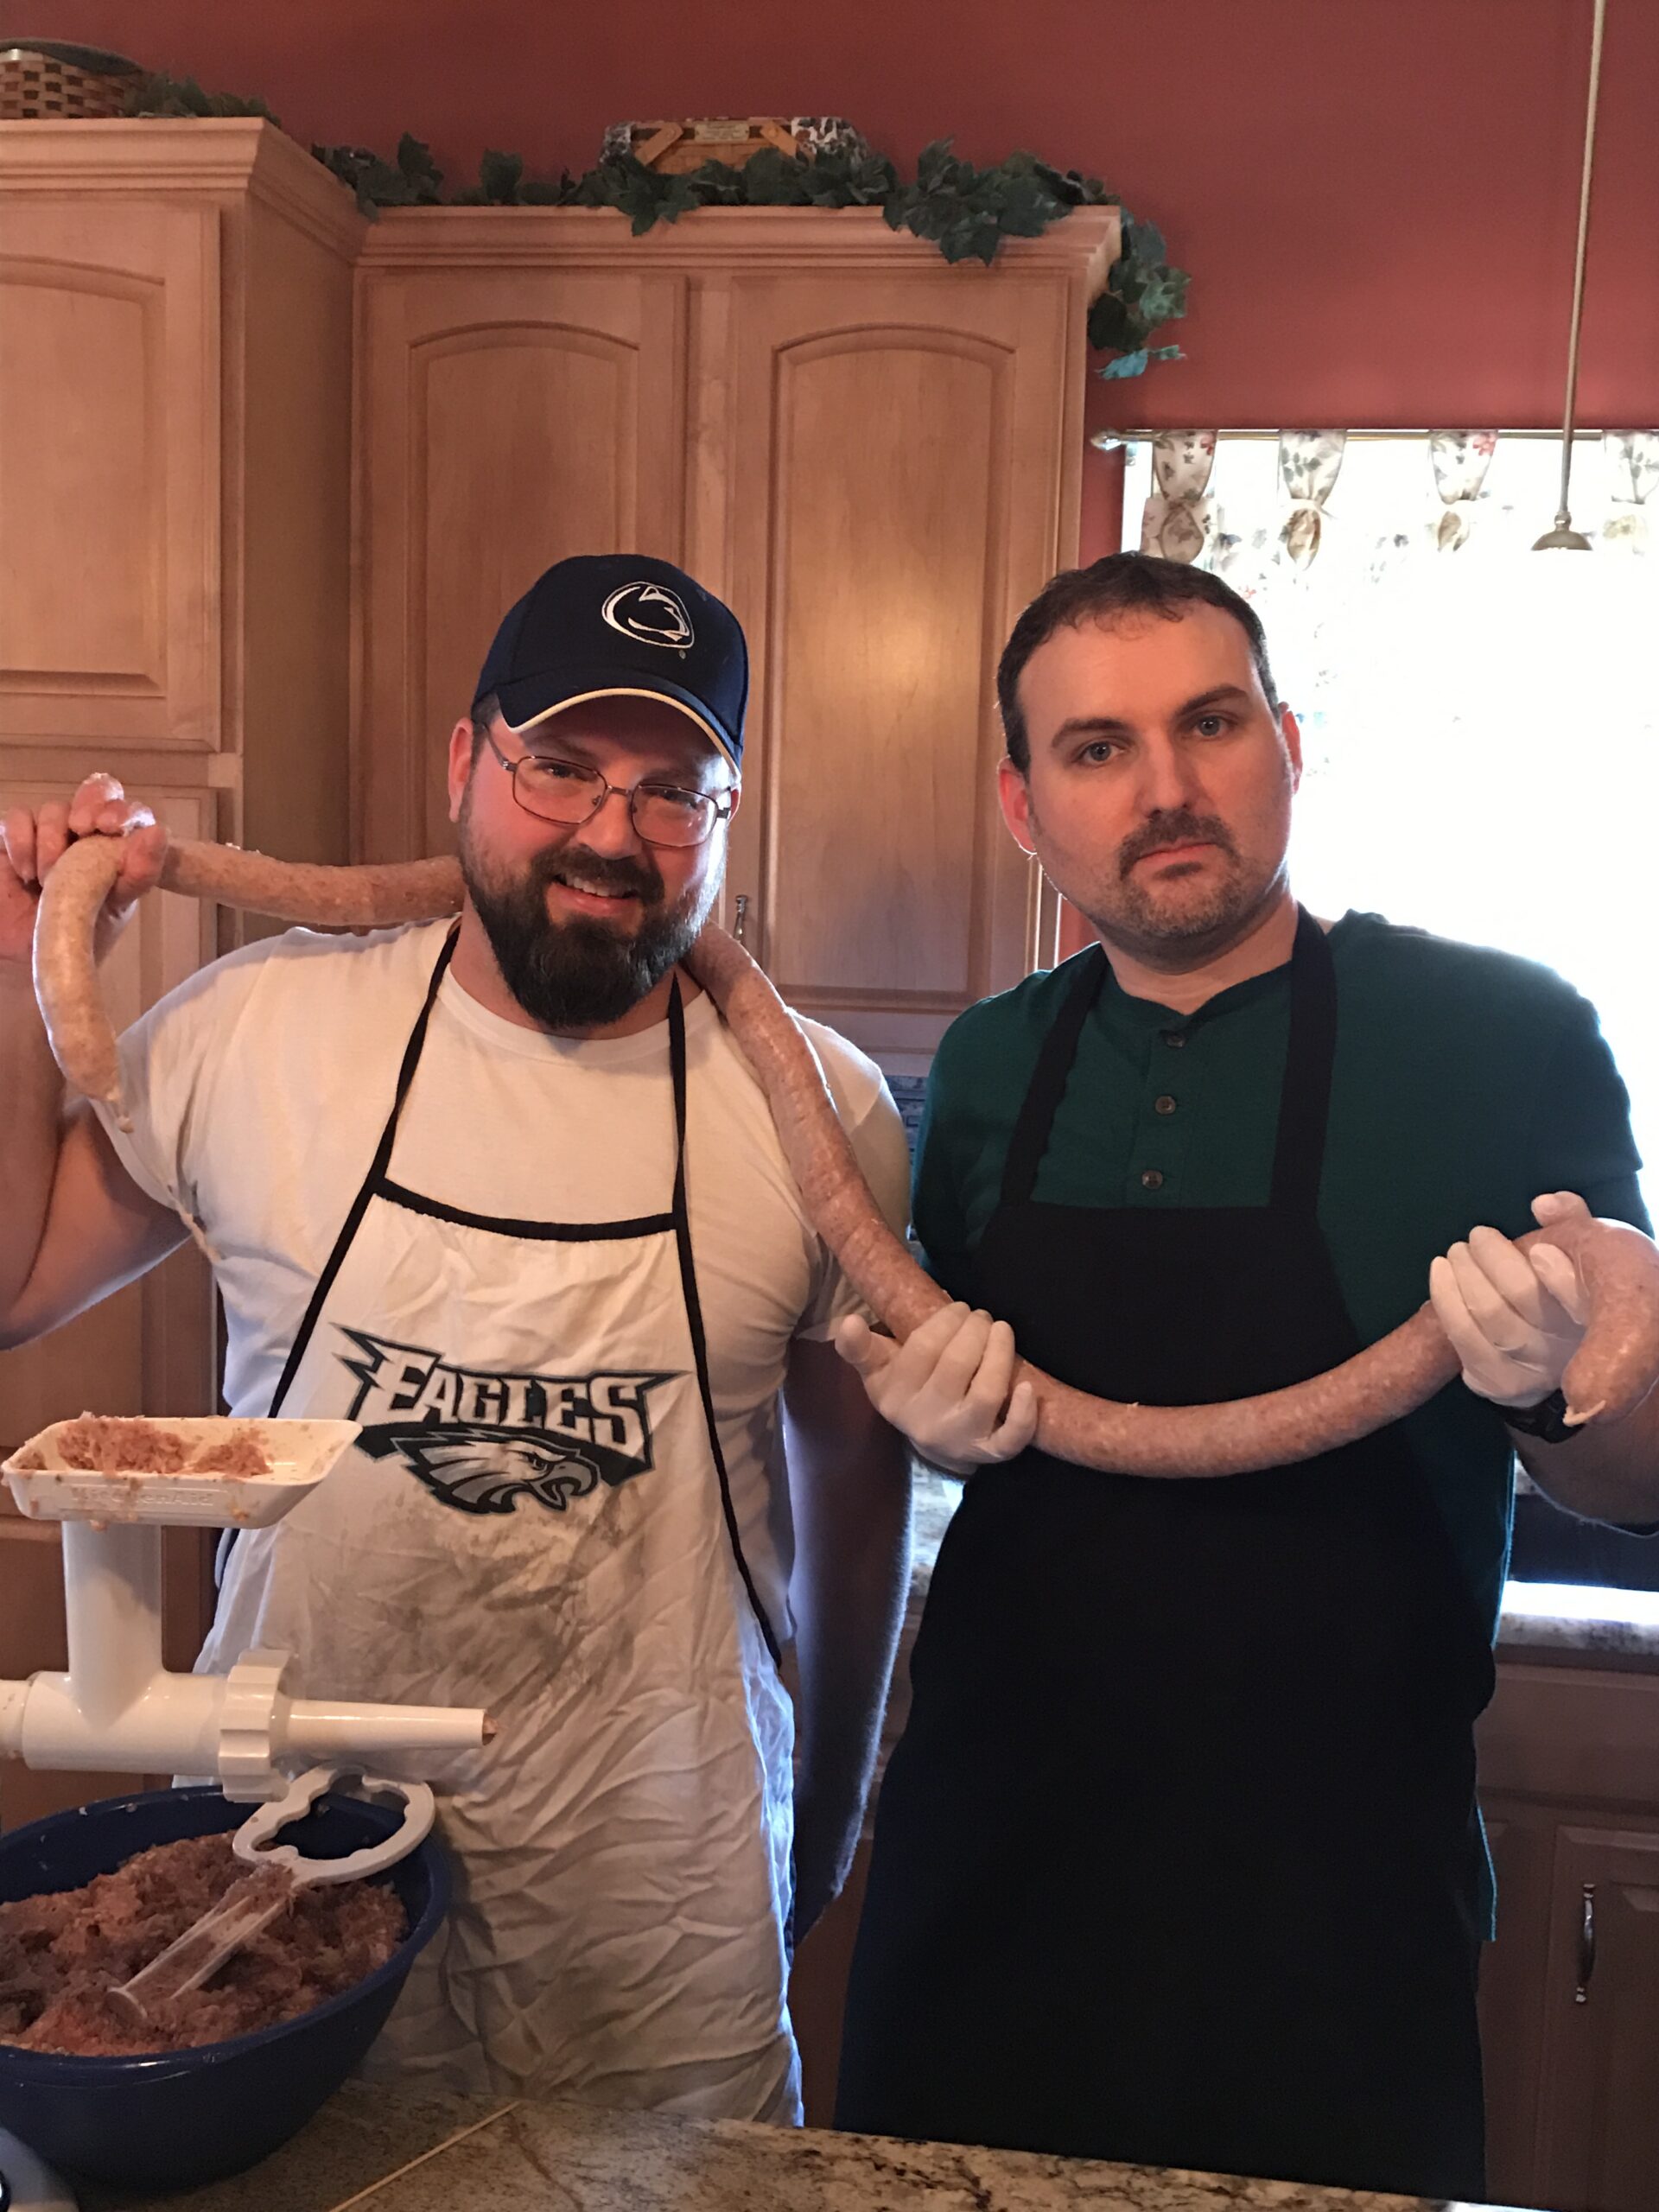
We Made 150 lbs of Sausages at Home – Here’s How Step by Step
Welcome to the World of Sausage Making
We’re Making Sausages Jerry…just like Kramer and Newman
“What is this?” Jerry Seinfeld asks. Kramer and Newman are in Jerry’s kitchen boppin’ to Jackie Davis’s organ and percussion tune “Manana (Is Soon Enough for Me)”. Kramer replies: “We’re Making Sausages!” Great times! But how do you make sausage at home? Is it making sausage hard? Is making homemade sausage dangerous?
Making sausage at home is fun and not complicated, and if you follow basic sanitary practices, it’s no more dangerous than making hamburgers or any other cooking with raw ground meat.
You just need to follow 4 basic sausage making steps:
- Season the meat
- Grind the meat again
- Stuff the meat
What do I need to make sausage?
Loose sausage can be made by simply adding some herbs and spices to some ground meat. But we’re going to go the extra mile and make rope sausage and sausage links. To make rope or link sausage, you will need the following equipment:
- Meat Grinder (or buy the meat already ground)
- Sausage Stuffer
- Meat lugs or bowls for mixing
- Food handler gloves (recommended)
What meat is best for making sausage? What ratio of meat to fat should I use?
Sausage can be made from pretty much any meat or blend of meats, or even plant-based foods. You’ll need a recipe, or at least a general plan, and that starts with a good meat to fat ratio. For most types of sausage, a 70% meat to 30% fat blend is ideal. This ratio packs in plenty of flavor and gives a nice balance between not-too-dry and not-too-greasy. Using Pork shoulder or beef brisket will get you to about 20% fat, and this 80% meat to 20% fat ratio is ok if you want a leaner sausage. But to reach the ideal 70% to 30% ratio, you’ll want to add some fatback (or we often times will use bacon). For example, if you’re using 2 lbs. of ground pork, you’ll need about a quarter pound of fatback or bacon. It’s doesn’t need to be precise, and you should adjust to your preferences, as well as the fat content of the meat, but this is a good starting point.
For chicken or turkey sausage, it’s best to use the darker cuts of meat as they naturally have more fat content than white meat. Fat equals flavor and cooks up juicier! For chicken or turkey, just assume you need to add the full 30% of fat. If your using duck, you can probably cut that back to 15%.
Grinding the Meat
Grinding the meat is the most laborious part of the sausage making progress. Our first attempt as a team, we were using a single KitchenAid mixer with a grinding attachment. This works great if you’re only making a pound or two. For larger quantities, you’ll want to look into a dedicated grinder. We are fortunate enough to still have a grocer with an actual meat department, and with a few days’ notice they’ll grind up our pork shoulder, chicken thighs, and bacon for us, so we can focus on the more fun parts: recipes and mixing and stuffing and smoking. But if you have the equipment, you should probably try to grind it yourself at least once, right?
Tip: Keep it Cold
To grind the meat and fat, you first want to cut it into strips or cubes and hand mix the meat and fat to get a good even distribution. Now obviously, when working with ground meat, there is a higher risk of contamination, so you want to keep the meat cold. But when grinding the meat at home, keeping it cold is essential to getting a good grind as well.
If you’re using a small hand grinder or kitchen tractor (aka KitchenAid mixer) with attachments, cut the meat into approximately half-inch cubes. Place them in the freezer to get them down to around 30F. Getting warmer loose sloppy meat to go through a small grinder is a nightmare!
You want to make sure your meat, and if possible, your grinding equipment, is kept cold. This will make the entire process go smoother.
First Grind
We want to start out with a course grind. Beef is the easiest to work with, and pork isn’t too bad. Chicken and turkey can be a challenge, so you want to be sure it is stiff from the freezer. If you have different sized dye’s, use one that’s a little larger than what you want in the final product. This will give you a nice course base to mix your seasonings into, and the meat will pass through the larger holes a whole lot easier.
How Much Salt do you add to sausage?
After your first pass through the grinder, add your seasonings. Adding herbs and spices are the special effects that really transform ground meat into sausage. I mean a hamburger, or meatloaf or tacos are made with ground meat, but we don’t call them sausages. First thing is the salt ratio. 2% salt by weight is the general rule of thumb, and that works out to about a half tablespoon of salt per pound… you’ll want to measure this! You’ll also need to take into consideration that many store-bought seasonings already contain salt. And in many of our recipes, we’re using bacon which also already contains salt. Adjust the amount of salt you add if other ingredients already contain it.
Seasoning Sausage with Herbs and Spices
So we need to think about what flavor profile we are going for. Are we going for a nice spicey chorizo? Then we’ll need cumin and chili powder. Are we going for a traditional breakfast sausage? Then fennel is going to be important. Maybe something more German? Mace is going to be key. Garlic, black and red pepper, mustard seed, thyme, and coriander are all commonly used in sausage recipes. The creative possibilities are endless, and this can be one of the most fun parts of the process. Just remember to keep the seasonings at a level where they compliment the meat, not overpower it.
With the seasonings added, gently flip the course-ground meat a few times. We’re just looking for a somewhat even distribution of the seasonings, they don’t need to be thoroughly mixed in yet. Once you have a roughly even mix, check the temperature again. If it’s warmed up (it probably has) put it back in the freezer to get it back down to temp.
Second Grind
Once you’ve gotten the course-ground meat back down to around 30F, run it through the grinder a second time using the dye you want for the final product. This will give you your final cut and blend the seasonings into the mixture thoroughly. If you’re making loose sausage, package it in bags or vacuum seal it and you’re done!
How to Make Sausage Ropes or Links
Protein Extraction
After the second grind is complete, mix the sausage (by hand or use the paddle attachment of your kitchen tractor) until some pasty whiteish stuff starts forming. This is protein extraction and is important to the texture of a good sausage. You don’t want to overdo it, but you do want to see that protein paste forming. When you get to this point, put the meat back in the freezer and start prepping your casings!
Prepping the Sausage Casings
Who doesn’t love that classic look of sausage ropes or links? To make good ropes and links, you’ll need good quality casings. Pork casings (sometimes labeled hog casings) are the most common and are available in many grocery stores. Lamb casings are an option if you don’t want pork and may take a little more effort to find. Casings packed in water are best to work with, but if you can’t find them, dry casings (available online) soaked overnight and can still do the job.
To prep the casing for stuffing, you’ll want to soak them in warm water for about an hour before use. Then run warm water through the casing for a minute or two and watch to see that there are no rips or tears in the casing. Rips or tears can lead to blowouts that will cause problems when you try to stuff it. Wet the tube on the stuffer and slide the freshly rinsed casing onto it. When you get the end of the casing, tie a simple knot and prick the end. As the ground meat fills the casing, it will also fill it with air—which you don’t want. The small pin-sized holes let the air out while keeping the meat in. Now you’re ready to stuff some sausages!
Stuffing the Sausage Casings
If you have somebody to help, this is a great time for them to join. Now that we have a casing ready, grab the ground meat mixture from the freezer and start loading it into the hopper of your sausage stuffer. The other person (or your other hand) should gently hold the casing in place on the tube, applying just enough pressure to keep the whole thing from sliding off but allowing the end to slip away as the ground meat mixture fills the casing. Push or pump or crank the stuffer at a slow, even pace. You’ll get a feel for this quickly.
If you’re using a combination grinder/stuffer (like the KitchenAid) make sure you remove the cutting dye before stuffing. You don’t want the perfectly ground meat going through a third grind and keeping the dye in their will make the process slower. And if your stuffer is electric, start with the speed at the slow end, and increase gradually until you get to a comfortable rhythm.
As the casing fills, it forms a rope. You’ll want it to be firm, but not so hard that you can’t squeeze an indentation into it. Overfilling will cause the casing to blow-out. If this happens, cut the casing where the tear is, and tie it off at both ends. Then resume filling the rest of the casing still on the stuffing tube.
Making Rope or Coiled Sausage
If rope sausage is your style, fill it up (or until you run out of meat). Then prick the casing every 4 to 5 inches to release air pockets, gently squeeze to even out the firmness, and tie off the end and trim off the extra casing. Some styles of sausage, such as Italian, are traditionally served in a coil. Take your sausage rope, roll it into a coil, and insert skewers to help it hold its shape.
Making Link Sausage
If you’re going for link sausages, the way to get the most consistent size is to first make the rope (leaving the one end untied) and gently squeeze to even out the firmness. Then pinch the rope to form indentations where you want to form the link-ends (like every 5-6 inches for a brat), and twist 2-3 rotations at the indentations, going in opposite directions at each step so you’re not un-twisting the previous link. Prick each link to release trapped air and tie off the end. We typically leave the links together, but if you are going to cut them apart, it’s best to refrigerate them overnight. At that point the filling and casing will have dried out a bit and formed a solid link that won’t easily unwind itself.
We do frequently twist the links as their coming out of the stuffer. Taking turns trying to keep up with the pace and make evenly sized links adds some competition to the sausage making event. From a quality perspective, this is not recommended. It’s difficult to keep the links evenly sized, and blowouts are more frequent. But it’s a fun challenge to do it this way, I guess.
Smoke That Sausage
If you’re smoking sausage, you want to get enough heat that you’re not inviting food born illness, but not so hot that it’s cooking the sausage. Cold smoking raw meat requires special techniques, that’s not what we’re talking about here. 160F – 180F is the range that is safe yet keeps your sausage “uncooked” and juicy. If you have a pellet grill, like the Traeger or Camp Chef, just dial it in and you’re golden!
If you have a charcoal grill/smoker like the Pit Barrel Cooker, start by getting about 6 coals going in a small pile with the vent open and lid partially open, then adjust as necessary. Add more charcoal to get more heat or close the lid and air vent to reduce heat. A smoking tube in combination with the charcoal works really well here!
Wrap-Up
That covers the basics to making sausage at home! Now you can start working out your own recipe or use one of our favorites we’ve included below. If you enjoyed this article or have questions, please hit us up in the comments section of this post or on any of our social media channels and don’t forget to keep in touch by signing up for the email list.
Sausage Recipes
Chicken Bacon Ranch (CBR)
This recipe was inspired by a pizza place that was close to the office of my old job. They had CBR pizza, CBR wraps, CBR hot subs, so why not CBR sausage? For the meats, use a 2:1 ratio of ground chicken thigh to ground bacon. Season with 1 packet of Hidden Valley Ranch seasoning, 2 tbl thyme, 2 tbl black pepper, and ¼ tsp of cayenne pepper per pound of meat. There is plenty of salt in the ranch seasoning, but maybe add a pinch of kosher salt to taste.
Brats
Bratwurst is a type of German sausage that has been enjoyed for centuries. The name “bratwurst” comes from the Old German words “brät,” which means finely chopped meat, and “wurst,” which means sausage. The origins of the bratwurst can be traced back to the 14th century in the Franconia region of Germany, where it was made from a mixture of pork and veal.rats – Gotta be Links
Bratwurst was originally made from a mixture of pork and veal, and was flavored with spices such as ginger, nutmeg, and coriander. The sausages were then grilled or fried and served with bread and mustard. Over time, the recipe for bratwurst evolved and various regional variations emerged. In the city of Nuremberg, for example, bratwurst made from finely ground veal and pork was produced, while in the region of Thuringia, a coarser-grained bratwurst made from pork and beef was popular.
American-style bratwurst is a type of sausage that is based on the traditional German bratwurst, but with a few key differences. One of the main differences is the type of meat used. American bratwurst is typically made from pork or a mixture of pork and beef, while German bratwurst is made from a mixture of pork and veal. In addition, American bratwurst is often flavored with herbs and spices such as garlic, onion, and black pepper, while German bratwurst is typically flavored with spices such as ginger, nutmeg, and coriander. Despite these differences, both American and German bratwurst are popular and enjoyed around the world.
The recipe for bratwurst varies depending on the type of bratwurst and the region it comes from. However, most bratwurst is made from a mixture of ground pork and veal, and is flavored with spices such as ginger, nutmeg, and coriander. Here is a basic recipe that you can use to make your own bratwurst at home:
Ingredients:
1 pound ground pork
1 pound ground veal
1 tablespoon ground ginger
1 tablespoon ground nutmeg
1 tablespoon ground coriander
1 teaspoon salt
1/2 teaspoon black pepper
Sausage casing (optional)
Instructions:
In a large mixing bowl, combine the ground pork, ground veal, ginger, nutmeg, coriander, salt, and pepper. Mix the ingredients together with your hands until they are well-combined.
If you are using sausage casing, soak the casing in warm water for at least 30 minutes to soften it.
To stuff the sausage, use a sausage stuffer or a funnel to fill the casing with the ground meat mixture. Leave some space at the end of each sausage so that it can expand during cooking.
Once the sausage is stuffed, you can cook it in a number of ways. You can grill the sausage over medium-high heat until it is cooked through, or you can cook it in a pan on the stove over medium heat until it is browned on all sides. Alternatively, you can also bake the sausage in the oven at 375 degrees Fahrenheit until it is cooked through.
Once the sausage is cooked, let it cool to room temperature before slicing and serving. You can also store the sausage in the refrigerator for up to a week, or freeze it for up to three months.
Breakfast Sausage with Fresh Herbs
Breakfast sausage is a type of sausage that is typically made from pork and seasoned with a mixture of spices such as black pepper, thyme, and sage. It is a popular breakfast food in many parts of the world, and has a long history dating back to ancient times.
The concept of breakfast sausage can be traced back to the Romans, who ate a type of sausage called botulus for breakfast. This sausage was made from the intestines of pigs and other animals, and was flavored with herbs and spices. Over time, the recipe for breakfast sausage evolved and spread to other parts of Europe. In the Middle Ages, breakfast sausage became a popular food among peasants and the working class, who ate it with bread and other simple dishes.
In the United States, breakfast sausage became popular during the 19th century, when German immigrants introduced the concept of the traditional German breakfast, which often included sausage, eggs, and other foods. Today, breakfast sausage is a staple food in many American households, and is enjoyed in a variety of dishes such as eggs and sausage, sausage gravy, and sausage biscuits.
Fennel is a common ingredient in sausage, and is used to add flavor and depth to the meat. To use fennel in sausage, you can start by toasting the fennel seeds in a pan over medium heat until they are fragrant. This will help to release the oils and enhance the flavor of the fennel.
Once the fennel seeds are toasted, you can grind them using a mortar and pestle or a spice grinder. You can then mix the ground fennel seeds into the ground meat that you are using for the sausage. Alternatively, you can also add whole fennel seeds to the sausage mixture if you prefer a more pronounced fennel flavor.
Once the fennel is mixed into the sausage, you can proceed with the rest of the sausage-making process. The fennel will add a subtle, licorice-like flavor to the sausage, and will complement other spices and seasonings that you might be using. I hope this helps! Let me know if you have any other questions.
Sausage Gravy
Sausage gravy is a hearty and flavorful breakfast dish made from sausage, flour, milk, and seasonings. It is typically served over biscuits, but can also be enjoyed on its own or with other breakfast foods. To make sausage gravy, you will need the following ingredients:
1 pound of sausage (preferably pork based breakfast sausage)
1/4 cup of all-purpose flour
3 cups of milk
Salt and pepper to taste
You will also need the following equipment:
A skillet or frying pan
A whisk or fork
Heat the skillet over medium heat, and crumble the sausage into the pan.
Cook the sausage until it is browned and fully cooked, stirring occasionally.
Use a slotted spoon to remove the sausage from the pan, leaving the drippings behind.
Add the flour to the pan and stir it into the sausage drippings to create a roux.
Cook the roux over medium heat for 1-2 minutes, stirring constantly, until it turns a light golden color.
Slowly whisk in the milk, stirring constantly to prevent lumps from forming.
Bring the gravy to a simmer, and then reduce the heat to low.
Add the cooked sausage back to the gravy, and season with salt and pepper to taste.
Simmer the gravy for 10-15 minutes, stirring occasionally, until it thickens to the desired consistency.
Serve the gravy over biscuits or other breakfast foods, and enjoy!
Greek Style Loukaniko
This is an ancient Greek sausage, similar to the ancient Roman lucanica. It can be made from lamb or pork or a blend. We use a blend. Loukaniko can include orange peel, garlic, coriander, leeks, and fennel seeds to cast a Mediterranean flavor in a rustic sausage, and can be fresh or lightly smoked (we recommend lightly smoked). A splash of wine adds some flavor and moisture.
Loukaniko is a Greek sausage that has a long history dating back to ancient times. It is made from pork and flavored with spices such as orange peel, fennel, and cumin. In ancient Greece, loukaniko was often served at festivals and other celebrations, and it remains a popular food in Greece today. It is commonly served grilled or fried, and it can also be used in dishes such as stews and soups.
There are many different recipes for loukaniko sausage, as it is a traditional food that has been made in various regions of Greece for centuries. However, a typical recipe for loukaniko sausage might include the following ingredients:
Pork, either ground or cut into small pieces
Orange peel
Fennel seeds
Cumin seeds
Salt
Pepper
To make loukaniko sausage, the pork is typically mixed with the spices and other seasonings, and then the mixture is formed into sausage shapes and either grilled or fried. The sausage can be served on its own, or it can be used in dishes such as stews or soups.
The recipe for loukaniko sausage varies depending on the region and the specific type of loukaniko that is being made. However, most loukaniko is made from pork and flavored with orange peel, fennel seeds, and other spices. Here is a basic recipe that you can use to make your own loukaniko sausage at home:
Ingredients:
2 pounds ground pork
1 tablespoon orange zest
1 tablespoon fennel seeds
1 teaspoon ground coriander
1 teaspoon ground cumin
1/2 teaspoon salt
Sausage casing (optional)
Instructions:
In a large mixing bowl, combine the ground pork, orange zest, fennel seeds, coriander, cumin, and salt. Mix the ingredients together with your hands until they are well-combined.
If you are using sausage casing, soak the casing in warm water for at least 30 minutes to soften it.
To stuff the sausage, use a sausage stuffer or a funnel to fill the casing with the ground meat mixture. Leave some space at the end of each sausage so that it can expand during cooking.
Once the sausage is stuffed, you can cook it in a number of ways. You can grill the sausage over medium-high heat until it is cooked through, or you can cook it in a pan on the stove over medium heat until it is browned on all sides. Alternatively, you can also bake the sausage in the oven at 375 degrees Fahrenheit until it is cooked through.
Once the sausage is cooked, let it cool to room temperature before slicing and serving. You can also store the sausage in the refrigerator for up to a week, or freeze
Loukaniko is a type of Greek sausage that is made from pork and flavored with orange peel, fennel seeds, and other spices. It is a popular food in Greece and other parts of the Mediterranean, and is typically served as part of a meze platter or with other dishes. Here are a few ideas for dishes to serve with loukaniko sausage:
Loukaniko and tzatziki:
This is a classic Greek combination that is perfect for a meze platter. To make this dish, simply slice the loukaniko sausage and grill or pan-fry it until it is browned on all sides. Then, serve the loukaniko with tzatziki, a traditional Greek sauce made from yogurt, cucumber, garlic, and herbs.
Tzatziki is a traditional Greek sauce made from yogurt, cucumber, garlic, and herbs. It is a refreshing and delicious condiment that is perfect for dipping vegetables, spreading on sandwiches, or serving with grilled meats. Here is a basic recipe that you can use to make your own tzatziki at home:
Ingredients:
2 cups plain yogurt
1 cucumber, grated
2 cloves garlic, minced
1 tablespoon fresh dill, chopped
1 tablespoon fresh mint, chopped
1 tablespoon lemon juice
Salt and black pepper, to taste
Instructions:
Start by grating the cucumber and squeezing out any excess moisture.
In a large mixing bowl, combine the yogurt, grated cucumber, minced garlic, chopped dill, chopped mint, and lemon juice. Mix the ingredients together until they are well-combined.
Season the tzatziki with salt and black pepper to taste.
Transfer the tzatziki to a jar or container and store it in the refrigerator until ready to use. The tzatziki will keep for up to a week in the refrigerator.
Loukaniko and roasted vegetables: This is a tasty and healthy way to enjoy loukaniko sausage. To make this dish, slice the loukaniko sausage and grill or pan-fry it until it is browned on all sides. Then, roast vegetables such as bell peppers, onions, and zucchini in the oven until they are tender. Serve the loukaniko and roasted vegetables with a side of couscous or quinoa.
Loukaniko and pasta: This is a simple and satisfying way to serve loukaniko sausage. To make this dish, slice the loukaniko sausage and grill or pan-fry it until it is browned on all sides. Then, cook pasta according to the package instructions and toss it with the loukaniko and your favorite sauce. You can also add vegetables such as spinach or broccoli to the pasta for added nutrition and flavor.
Kielbasa
Kielbasa is a type of sausage that originated in Poland. The name “kielbasa” comes from the Polish word “kiełbasa,” which means sausage. Kielbasa is a popular food in Poland and other parts of Eastern Europe, and has a long history dating back to the Middle Ages.
The origins of kielbasa can be traced back to the 13th century, when sausage-making was a popular way to preserve meat. In Poland, kielbasa was traditionally made from pork and flavored with garlic and other spices. The sausages were then smoked over a fire made from juniper branches, which gave the kielbasa its characteristic smoky flavor.
Over time, the recipe for kielbasa evolved and various regional variations emerged. In the city of Krakow, for example, kielbasa was made from a mixture of pork and beef, while in the region of Silesia, kielbasa was made from a mixture of pork and veal. Today, kielbasa is enjoyed around the world and is a popular food in many Polish and Eastern European communities.
The recipe for kielbasa sausage varies depending on the type of kielbasa and the region it comes from. However, most kielbasa is made from a mixture of ground pork and garlic, and is flavored with spices such as marjoram, allspice, and black pepper. Here is a basic recipe that you can use to make your own kielbasa sausage at home:
Ingredients:
2 pounds ground pork
1 tablespoon minced garlic
1 tablespoon marjoram
1 teaspoon allspice
1 teaspoon black pepper
1/2 teaspoon salt
Sausage casing (optional)
Instructions:
In a large mixing bowl, combine the ground pork, garlic, marjoram, allspice, black pepper, and salt. Mix the ingredients together with your hands until they are well-combined.
If you are using sausage casing, soak the casing in warm water for at least 30 minutes to soften it.
To stuff the sausage, use a sausage stuffer or a funnel to fill the casing with the ground meat mixture. Leave some space at the end of each sausage so that it can expand during cooking.
Once the sausage is stuffed, you can cook it in a number of ways. You can grill the sausage over medium-high heat until it is cooked through, or you can cook it in a pan on the stove over medium heat until it is browned on all sides. Alternatively, you can also bake the sausage in the oven at 375 degrees Fahrenheit until it is cooked through.
Once the sausage is cooked, let it cool to room temperature before slicing and serving. You can also store the sausage in the refrigerator for up to a week, or freeze it for up to three months.
Kielbasa sausage is a versatile food that can be served with a variety of dishes. Some common dishes to serve with kielbasa include sauerkraut, potatoes, and other vegetables. Here are a few ideas for dishes to serve with kielbasa:
Kielbasa and sauerkraut: This is a classic combination that is popular in many Eastern European countries. To make this dish, simply slice the kielbasa sausage and sauté it in a pan until it is browned on all sides. Then, add sauerkraut to the pan and heat until it is hot. Serve the kielbasa and sauerkraut with boiled potatoes or crusty bread.
Kielbasa and potatoes: This is another simple and tasty way to enjoy kielbasa sausage. To make this dish, slice the kielbasa sausage and sauté it in a pan until it is browned on all sides. Then, add boiled potatoes to the pan and heat until they are hot. You can also add vegetables such as bell peppers, onions, and mushrooms to the pan for added flavor and nutrition.
Kielbasa and peppers: This is a colorful and delicious way to serve kielbasa sausage. To make this dish, slice the kielbasa sausage and sauté it in a pan until it is browned on all sides. Then, add sliced bell peppers and onions to the pan and cook until they are tender. Serve the kielbasa and peppers with boiled potatoes or crusty bread.
Dijon mustard
Dijon mustard is a type of mustard that originated in the city of Dijon, France. It is made from mustard seeds that are ground into a paste and mixed with white wine, vinegar, and other seasonings. The history of Dijon mustard dates back to the 13th century, when mustard was first used as a condiment in France.
Mustard has been used as a condiment for centuries, and was believed to have medicinal properties. In the Middle Ages, mustard was used to treat a variety of ailments, and was often mixed with honey or vinegar to make it more palatable. It was not until the 18th century, however, that mustard began to be produced on a large scale in France.
The origins of Dijon mustard can be traced back to the city of Dijon, where it was first produced in the 19th century. The recipe for Dijon mustard was developed by Jean Naigeon, a mustard maker from Dijon, who replaced the vinegar used in traditional mustard with white wine. This gave the mustard a smoother, milder flavor, and helped it to become popular throughout France and beyond. Today, Dijon mustard is enjoyed around the world and is used as a condiment for a variety of dishes.
The recipe for Dijon mustard varies depending on the brand and the specific type of mustard that is being made. However, most Dijon mustard is made from mustard seeds, white wine, vinegar, and other seasonings. Here is a basic recipe that you can use to make your own Dijon mustard at home:
Ingredients:
1 cup mustard seeds
1/2 cup white wine
1/4 cup vinegar
1 tablespoon salt
1 tablespoon sugar
1 tablespoon water
1 teaspoon garlic powder
Instructions:
Start by grinding the mustard seeds into a fine powder using a spice grinder or a mortar and pestle.
In a small saucepan, combine the ground mustard seeds, white wine, vinegar, salt, sugar, and water. Stir to combine.
Place the saucepan over medium heat and bring the mixture to a simmer. Cook, stirring constantly, until the mustard thickens and turns a pale yellow color, about 5 minutes.
Remove the saucepan from the heat and stir in the garlic powder. Let the mustard cool to room temperature.
Once the mustard is cool, transfer it to a jar or container and store it in the refrigerator. The mustard will keep for up to a month in the refrigerator.
Pierogi
Pierogi are a type of dumpling that originated in Central and Eastern Europe. The name “pierogi” comes from the Polish word “pierogi,” which means dumplings. Pierogi are a popular food in Poland and other parts of Central and Eastern Europe, and have a long history dating back to the Middle Ages.
The origins of pierogi can be traced back to the 13th century, when dumplings were a common food among peasants and the working class. In Poland, pierogi were traditionally made from unleavened dough and filled with a variety of ingredients such as potatoes, cheese, and meat. Over time, the recipe for pierogi evolved and various regional variations emerged.
In the 19th and 20th centuries, pierogi became a popular food in America, where they were introduced by Polish immigrants. Today, pierogi are enjoyed around the world and are a staple food in many Polish and Eastern European communities.
In America, pierogi became popular in the 19th and 20th centuries, when they were introduced by Polish immigrants. In the United States, pierogi are often associated with Polish and Eastern European cuisine, and are a common food in many Polish and Eastern European communities.
In America, pierogi are often served as a side dish or a snack. They are often boiled or fried and served with toppings such as sour cream, bacon bits, or sautéed onions. In some parts of the United States, pierogi are also served as a main dish, and are filled with a variety of ingredients such as potatoes, cheese, meat, or sauerkraut.
Today, pierogi are enjoyed by people of all backgrounds in the United States, and are a popular food at festivals and other events. They are also widely available in supermarkets and restaurants, and are a beloved comfort food for many Americans.
The recipe for pierogi varies depending on the type of pierogi and the region it comes from. However, most pierogi are made from a dough that is filled with a variety of ingredients such as potatoes, cheese, or meat. Here is a basic recipe that you can use to make your own pierogi at home:
Ingredients:
2 cups all-purpose flour
1/2 cup water
1/2 cup sour cream
1 egg
1/2 teaspoon salt
Filling of your choice (such as potatoes, cheese, or meat)
Instructions:
In a large mixing bowl, combine the flour, water, sour cream, egg, and salt. Mix the ingredients together with your hands until they form a dough.
On a floured surface, roll out the dough to a thickness of about 1/8 inch. Use a biscuit cutter or a glass to cut the dough into circles.
Place a spoonful of the filling of your choice onto the center of each dough circle. Fold the dough over the filling and press the edges together to seal the pierogi.
In a large pot of boiling water, cook the pierogi for about 5 minutes, or until they float to the surface.
Once the pierogi are cooked, drain them and serve them hot with toppings such as sour cream, bacon bits, or sautéed onions.
Wrap-Up: Now You’re Ready to Start Your Own Sausage Crew
Sausage-making looks intimidating from the outside, but once you’ve ground the meat, mixed in your seasonings, run that second grind, and stuffed your first casing, you realize it might taste like magic, but making it’s not magic — it’s just a craft. And like any good craft, it gets better every time you do it.
You’ve now got the fundamentals:
Keeping everything cold, hitting the right fat ratio, seasoning with intention, extracting protein for that perfect snap, and stuffing casings without blowouts. You’ve also got a lineup of recipes that can take you from breakfast patties to Greek loukaniko to smoky kielbasa and beyond.
Most people never try making sausage at home. You can— and now you know why it’s worth the effort. It’s hands-on, it’s communal, it’s a little messy, and it’s a whole lot of fun. Whether you’re making 5 pounds or 150, you’re creating something that brings people together around a grill, a smoker, or a skillet.
If you enjoyed this guide or want to share your own sausage victories (or blowouts), drop a comment or tag us on social. And if you want more Slowpaddle guides, recipes, and behind-the-scenes adventures, make sure you’re on the email list — we’ve got plenty more coming your way.
Now go make some magic!